
This room was released on 4/14/2023 and is rated medium in difficulty. Shout-out to the room creator, ar33zy. You can access the room at https://tryhackme.com/room/boogeyman1/.
This is a blueteam side of the cybersecurity field. The skills/tools to be tested and needed to complete this challenge are Phishing Analysis, PowerShell Log Analysis, Linux Commands, and Traffic Analysis using Wireshark and TShark, Thunderbird, LNKParse, and JQ, which is a JSON processor.
I intentionally masked parts of the answers, so you will have to perform hands-on work to unmask the entirety of the answers.
Task 2 Questions:
- What is the email address used to send the phishing email?
- a*******@**********.***

- a*******@**********.***
- What is the email address of the victim?
- j*******.********@*******.***

- j*******.********@*******.***
- What is the name of the third-party mail relay service used by the attacker based on the DKIM-Signature and List-Unsubscribe headers?
- e***********
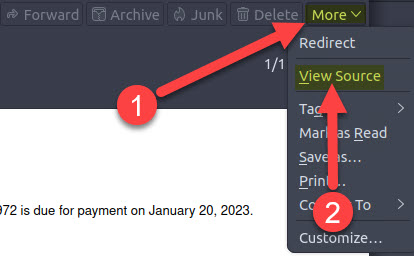
- Open the email using ThunderBird.
- Click the More drop-down button and choose View Source to inspect the email header.

- What is the name of the file inside the encrypted attachment?
- I******_********.***
- Download and unzip the attachment, Invoice.zip.

- What is the password of the encrypted attachment?
- I***********
- The password is in the email body.

- Based on the result of the lnkparse tool, what is the encoded payload found in the Command Line Arguments field?
- a*********……….==

- Run the command: lnkparse I******_********.***

- a*********……….==
Task 3 Questions:
- What are the domains used by the attacker for the file hosting and C2? Provide the domains in alphabetical order.
- c**.**********.***,f****.**********.***
- Locate the file Powershell.json
- Use the JQ tool which is a lightweight command-line JSON processor.
- Run the command: cat powershell.json | jq to get an idea of what kind of information is inside the powershell.json file

- From the information we got above, we can now use specific fields to filter the results when running the JQ tool, making it easier to review all the information.
- Of all the fields presented when running the JQ tool, we only need to see the ScriptBlockText field. Run the command cat powershell.json | jq ‘{ScriptBlockText}’

- Scroll through all the listed ScriptBlockText entries, and you will see two domains used for file hosting and C2.

- What is the name of the enumeration tool downloaded by the attacker?
- S*******
- One of the ScriptBlockText entries will show you the enumeration tool that was downloaded by the attacker.

- What is the file accessed by the attacker using the downloaded sq3.exe binary? Provide the full file path with escaped backlashes.
- C:\\*****\\j.********\\*******\\*****\\********\\*********.********************_*************\\**********\\****.******
- The question gave us a helpful string that we can use, sq3.exe. We can run the same command we used above and add the use of grep. Run the command: cat powershell.json | jq ‘{ScriptBlockText’} | grep sq3.exe

- What is the software that uses the file in Q3?
- M******** ****** *****
- We can use the previous command to get the software name.

- What is the name of the exfiltrated file?
- p********_****.****
- Going back to the results of running the command: cat powershell.json | jq ‘{ScriptBlockText}”, you will find a file that was being sent to a destination IP of 161.71.211.113.

- What type of file uses the .kdbx file extension?
- K******
- You can just Google what program uses .kdbx file extension.
- What is the encoding used during the exfiltration attempt of the sensitive file?
- H**
- Going back to the results of running the command: cat powershell.json | jq ‘{ScriptBlockText}”, you will find the encoding that was used during the exfiltration.

- What is the tool used for exfiltration?
- N*******
- Going back to the results of running the command: cat powershell.json | jq ‘{ScriptBlockText}”, you will find the tool that was used during the exfiltration.

Task 4 Questions:
- What software was used by the attacker to host its presumed file/payload server?
- P*****
- We can use the information gathered from the Powershell logs to filter and understand the packets contained in the capture.pcapng file.
- Since we are tasked to find out the software used by the payload server, we can filter the packet for HTTP protocol and also use an IP address of 167.71.211.113.
- Use the filter HTTP && ip.addr == 167.71.211.113

- Right-click any of the frames, then Follow > HTTP Stream

- What HTTP method was used by the C2 for the output commands executed by the attacker?
- P***
- What is the protocol used during the exfiltration activity?
- D**
- Looking back at the last question in Task 3, you can identify the protocol based on the tool used during exfiltration.
- What is the password of the exfiltrated file?
- %*******************
- You will have to understand the commands used by the attacker through an analysis of the powershell.json file to understand the steps and order of commands executed by the attacker. This is helpful as you need to look inside the POST request methods using WireShark. Filtering the packets using http.request.method == POST, there are 46 results, and it will take a long time to go through each. By analyzing the steps taken by the attacker using powershell.json, you will know how far or close you are to the correct packet to review and retrieve the password.

- To assist you, look at the 44467 frame. Right-click and follow the stream.

- Copy the decimal content of the packet. Open CyberChef, and paste the what you copied above inside the Input field.

- Convert the data using the From Decimal recipe, and you will see the password in the Output field.

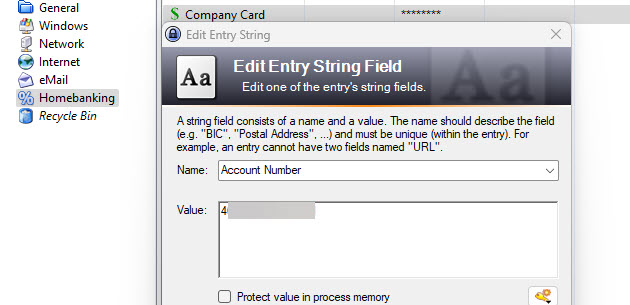
- What is the credit card number stored inside the exfiltrated file?
- 4***************
- We know that the exfiltration of the file was done using the DNS protocol. So, first, we have to filter the packet capture file in WireShark using DNS, and also the PowerShell log showed us that IP 167.71.211.113 was used as the destination to exfiltrate the file. Use the filter DNS && ip.dst == 167.71.211.113

- When you look at the image above, there are some random strings in the DNS queries. And if you remember, the attacker used nslookup to exfiltrate the file. Our task now is assembling all of the strings used in the DNS query so we can rebuild the exfiltrated file. The sensitive file was exfiltrated in fragments, so we must put them all together. We can manually go through all 444 packets and then copy and paste each string to put them together, but that will take a long time and a tedious process.

- Enter the use of TShark.
- Let’s check first and list all of the packets that contains a DNS query with “bpakcagin.xyz”. Enter the command tshark -r capture.pcapng -n -T fields -e dns.qry.name | grep “bpakcaging.xyz”

- You can see above that it gave us the list of DNS queries with random strings like what we saw on Wireshark. And it also included the rest of the domain name. We only need the string before the .”bpakcaging.xyz…..”
- To filter our list and not include any other information except for the random strings let’s try and trim the information by cutting all information from the first period. Run the command: tshark -r capture.pcapng -n -T fields -e dns.qry.name | grep “bpakcaging.xyz” | cut -f 1 -d “.”

- As we can see, we have duplicate entries, and we won’t be able to rebuild the file with duplicate strings included. Let’s clean it up by using the uniq command. Run: tshark -r capture.pcapng -n -T fields -e dns.qry.name | grep “bpakcaging.xyz” | cut -f 1 -d “.” | uniq -c

- Run it again and direct the result to a text file. Clean it up and make sure that there are no new lines. I saved my file as sensitive_file.txt.

- Make sure to remove all new lines “\n”. Since we extracted the strings separately, we assumed a “\n” switch after each string. So, we have to clean it up by removing the new lines. Run the command: cat sensisitve_file.txt | tr -d ‘\n’ > file

- Now, copy the file’s content and use CyberChef to convert the information. And since we know that the file was exfiltrated using hex encoding, we can decode the contents of the file using the recipe, From Hex

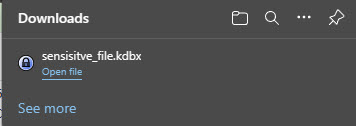
- Download the decoded file and save it as a .kdbx file.

- Now, we have our keepass database file:
- Now, let us open the file above using Keepass and use the password that you retrieved from the previous question.

- And we can retrieve the answer to the last question.
I hope you enjoyed reading my post and that you find it helpful.
Please subscribe to my blog. Thank you!

Awesome write up. There is no way I could’ve completed this room without it. Question, do you complete the room and THEN do the write up or do you do them at the same time? #HeroStatus
LikeLike
Thank you! I try to complete it first then redo everything to blog about it. Haha. I can’t do it at the same time because I don’t want my train of thoughts to get interrupted. 😂
LikeLike