
I am writing this blog entry because I know I was not the only one who had trouble setting up my own malware analysis box – Cuckoo. I have tried many tutorials, both written and video recorded, and I could never make it work. Finally, I decided to work on it until I came up with the process that successfully deployed Cuckoo for me. This is me putting things together from different sources. I hope someone will find this entry helpful.
I am also a visual learner, so in addition to the text commands, I’ve also included screenshots of each step I took:
Requirements:
- Ubuntu 18.04 – This is your Guest OS in VMWare Workstation
- Windows 7 – This is your Guest OS in VirtualBox inside the Ubuntu Guest OS
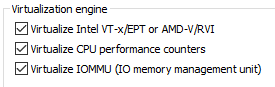
- Enable virtualization within VMWare in Ubuntu VM:
Steps:
- Update Ubuntu box:
- sudo apt-get update

- sudo apt-get update
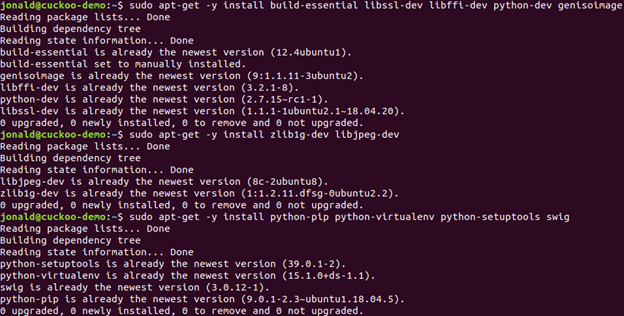
- Install required packages and apt repositories:
- sudo apt-get -y install python python-pip python-dev libffi-dev libssl-dev

- sudo apt-get -y install python-virtualenv python-setuptools

- sudo apt-get -y install libjpeg-dev zlib1g-dev swig

- sudo apt-get -y install python python-pip python-dev libffi-dev libssl-dev
- Install MongoDB:
- sudo apt-get -y install mongodb

- sudo apt-get -y install mongodb
- Install PostgreSQL:
- sudo apt-get -y install postgresql libpq-dev

- sudo apt-get -y install postgresql libpq-dev
- Install VirtualBox:
- sudo apt-get -y install virtualbox

- sudo apt-get -y install virtualbox
- Install tcpdump AppArmor:
- sudo apt-get -y install tcpdump apparmor-utils

- sudo aa-disable /usr/sbin/tcpdump

- sudo apt-get -y install tcpdump apparmor-utils
- Add a new group and add a user so you don’t have to run as root:
- sudo adduser –disabled-password –gecos “” jonaldtest

- sudo groupadd pcap
- sudo usermod -a -G pcap jonaldtest
- sudo chgrp pcap /usr/sbin/tcpdump
- sudo setcap cap_net_raw,cap_net_admin=eip /usr/sbin/tcpdump
- sudo adduser –disabled-password –gecos “” jonaldtest
- Verify the last command:
- getcap /usr/sbin/tcpdump

- getcap /usr/sbin/tcpdump
- Install M2Crypto:
- sudo pip install m2crypto

- sudo pip install m2crypto
- Add the account you created in step 7 to vboxusers group:
- sudo usermod -a -G vboxusers jonaldtest

- sudo usermod -a -G vboxusers jonaldtest
- Create a virtual environment by using a script. Save the script as cuckoo-setup-virtualenv.sh (Shoutout to Josh Stroschein for the code) You can download the script at the end of this post:
- Change the permission of the script:
- sudo chmod +x cuckoo-setup-virtualenv.sh

- sudo chmod +x cuckoo-setup-virtualenv.sh
- Run the script using your current logged-in user and not the one you created in step 7:
- sudo -u jonald ./cuckoo-setup-virtualenv.sh

- sudo -u jonald ./cuckoo-setup-virtualenv.sh
- Update your current shell environment:
- source ~/.bashrc

- source ~/.bashrc
- Create a virtual environment. You can name your virtual environment anything you want, I am using sandbox:
- mkvirtualenv -p python2.7 sandbox

- mkvirtualenv -p python2.7 sandbox
- Setup and install cuckoo while you are inside your newly created virtual env (sandbox):
- pip install -U pip setuptools

- pip install -U cuckoo

- pip install -U pip setuptools
- Create a directory to mount Windows 7 iso (open a new terminal):
- sudo mkdir /mnt/win7
- sudo chown jonaldtest:jonaldtest /mnt/win7

- sudo mount -o ro,loop win7ultimate.iso /mnt/win7

- Install packages again just to make sure that there are no missing packages after everything that we have installed so far:
- sudo apt-get -y install build-essential libssl-dev libffi-dev python-dev genisoimage
- sudo apt-get -y install zlib1g-dev libjpeg-dev
- sudo apt-get -y install python-pip python-virtualenv python-setuptools swig
- Install vmcloak and run it (inside the virtual environment):
- pip install -U vmcloak

- vmcloak

- pip install -U vmcloak
- Create a HOST-ONLY network adapter using vmcloak:
- vmcloak-vboxnet0

- vmcloak-vboxnet0
- Setup Windows VM (this takes between 45 – 60 minutes):
- vmcloak init –verbose –win7x64 win7x64base –cpus 2 –ramsize 2048

- vmcloak init –verbose –win7x64 win7x64base –cpus 2 –ramsize 2048
- Clone the Windows VM:
- vmcloak clone win7x64base win7x64cuckoo

- vmcloak clone win7x64base win7x64cuckoo
- Install some basic software packages:
- vmcloak install win7x64cuckoo adobepdf pillow java flash vcredist vcredist.version=2015u3 wallpaper ie11 office office.version=2013 office.isopath=/home/jonald/Office_2013_Plus.iso office.serialkey= XXXXX-XXXXX-XXXXX-XXXXX-XXXXX

- vmcloak install win7x64cuckoo adobepdf pillow java flash vcredist vcredist.version=2015u3 wallpaper ie11 office office.version=2013 office.isopath=/home/jonald/Office_2013_Plus.iso office.serialkey= XXXXX-XXXXX-XXXXX-XXXXX-XXXXX
- Create the Windows VMs:
- vmcloak snapshot –count 4 win7x64cuckoo 192.168.56.101

- vmcloak snapshot –count 4 win7x64cuckoo 192.168.56.101
- View the list of VMs:
- vmcloak list vms

- vmcloak list vms
- Create the cuckoo directory where all config files get saved (still inside the virtual environment):
- cuckoo init

- cuckoo init
- Update cuckoo to the latest signature (you have to do this regularly so the signature gets updated with the current known threats signature):
- cd .cuckoo/conf
- cuckoo community –force

- Open .cuckoo/conf/virtualbox.conf and change the MODE to GUI:
- nano virtualbox.conf
- mode = gui (from headless)
- save the change

- Copy and paste the below command to add the 4 VMs we created to the conf file:
- while read -r vm ip; do cuckoo machine –add $vm $ip; done < <(vmcloak list vms)

- while read -r vm ip; do cuckoo machine –add $vm $ip; done < <(vmcloak list vms)
- Open virtualbox.conf again, remove cuckoo1 under machines, delete everything after controlports and stop when you see the first IP address that matches the IP under machines:
- Delete cuckoo1


- Delete cuckoo1
- Check your network adapter for the next setup steps:
- ip a

- ip a
- Run the following commands inside of the virtual environment:
- sudo sysctl -w net.ipv4.conf.vboxnet0.forwarding=1
- sudo sysctl -w net.ipv4.conf.ens33.forwarding=1
- sudo iptables -t nat -A POSTROUTING -o ens33 -s 192.168.56.0/24 -j MASQUERADE
- sudo iptables -P FORWARD DROP
- sudo iptables -A FORWARD -m state –state RELATED,ESTABLISHED -j ACCEPT
- sudo iptables -A FORWARD -s 192.168.56.0/24 -j ACCEPT

- OPTIONAL: Install terminator:
- sudo apt-get install terminator

- sudo apt-get install terminator
- Open Terminator and split it to four windows:
- Split to 4 windows

- Split to 4 windows
- Enter the virtual environment in all terminals:
- workon sandbox
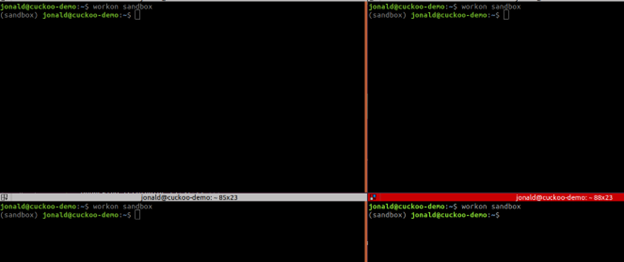
- workon sandbox
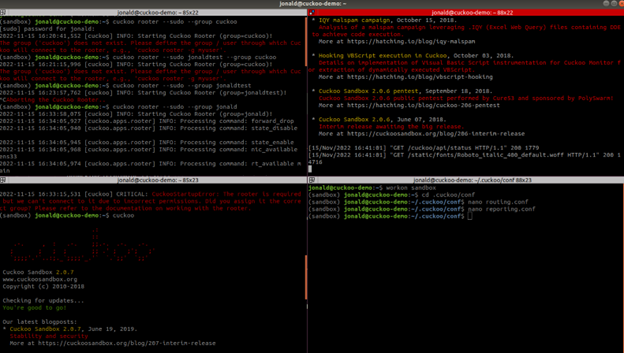
- (Terminator window 1) type:
- cuckoo rooter –sudo –group jonald

- Leave terminal window 1 running
- cuckoo rooter –sudo –group jonald
- Change the routing information. Open routing.conf and change the internet entry to your network adapter (ens33):
- internet = ens33

- save the file
- internet = ens33
- Change the reporting information. Open reporting.conf and change the MongoDB entry to yes:
- enabled = yes

- save the file
- enabled = yes
- Do not touch the first window with command “cuckoo rooter –sudo –group jonald”. Go to another and start cuckoo:
- cuckoo

- Leave terminal window 2 running
- cuckoo
- In a third terminal, start the cuckoo web server:
- cuckoo web –host 127.0.0.1 –port 8080

- Leave terminal window 3 running
- cuckoo web –host 127.0.0.1 –port 8080
- Open a web browser to access the cuckoo web interface:
- This is how your Terminator should look like while using cuckoo sandbox:
- Terminator
- Don’t forget to take a snapshot of your Ubuntu VM. I would recommend reverting to a snapshot after a verified malicious file analysis. You don’t want to take the risk of an 0-day VM escape vulnerability. Haha
- Terminator

I hope you find this helpful. If you haven’t subscribed here, please do so.
Below is the script I used in step 11.
#!/usr/bin/env bash

# Author: Josh Stroschein
# Source: https://askubuntu.com/questions/244641/how-to-set-up-and-use-a-virtual-python-environment-in-ubuntu
# NOTES: Run this script as: sudo -u <USERNAME> cuckoo-setup-virtualenv.sh
#        Additionally, your environment may not allow the script to source bashrc and you may need to do this manually after the script completes

# install virtualenv
sudo apt-get update && sudo apt-get -y install virtualenv

# install virtualenvwrapper
sudo apt-get -y install virtualenvwrapper

echo "source /usr/share/virtualenvwrapper/virtualenvwrapper.sh" >> ~/.bashrc

# install pip for python3
sudo apt-get -y install python3-pip

# turn on bash auto-complete for pip
pip3 completion --bash >> ~/.bashrc

# avoid installing with root
pip3 install --user virtualenvwrapper

echo "export VIRTUALENVWRAPPER_PYTHON=/usr/bin/python3" >> ~/.bashrc

echo "source ~/.local/bin/virtualenvwrapper.sh" >> ~/.bashrc

export WORKON_HOME=~/.virtualenvs

echo "export WORKON_HOME=~/.virtualenvs" >> ~/.bashrc

echo "export PIP_VIRTUALENV_BASE=~/.virtualenvs" >> ~/.bashrc

source ~/.bashrc
This will be so helpful and come in handy. Thank you!
LikeLike